Visual Studio Code for C++
Install MinGW compiler
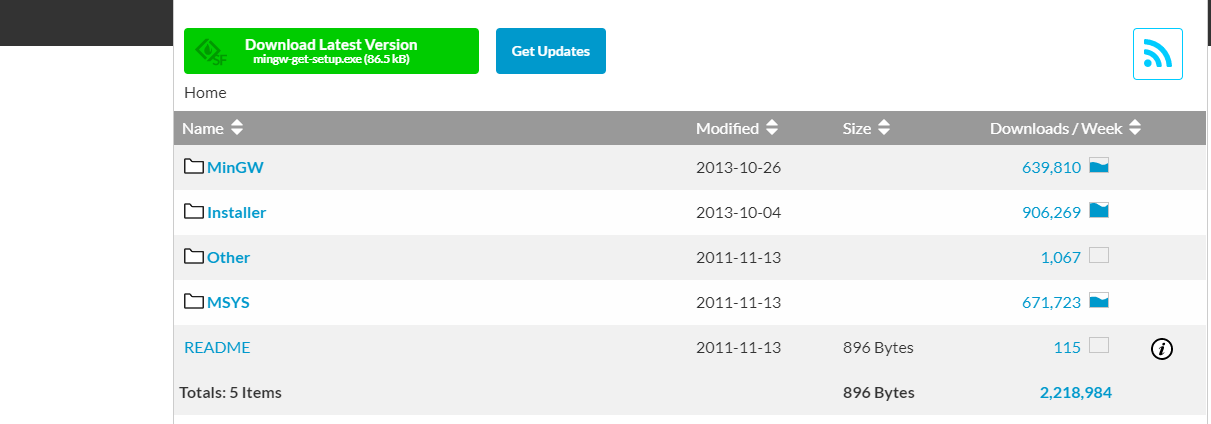
First you need to install a C++ compiler. For Windows the easiest option is MinGW. Goto http://www.mingw.org/ and select "Downloads".
Wait for SourceForge to load and select the big green button that states "Download Latest Version":

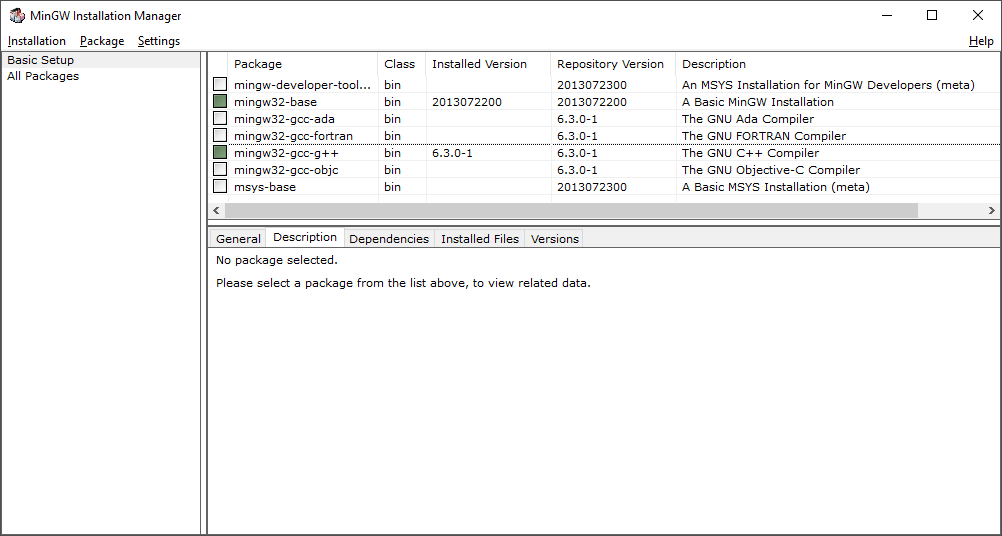
Install the package and wait for the package selector to load. Now select the "mingw32-base" and "mingw32-gcc-g++" packages and mark them for installation. From the menu select Installation => Apply Changes to install the packages. The end result should be:

Open a powershell and make sure that the g++ --version command gives a comparable output to the one given below:
C:\Users\nicod\> g++ --version
g++.exe (MinGW.org GCC-6.3.0-1) 6.3.0
Copyright (C) 2016 Free Software Foundation, Inc.
This is free software; see the source for copying conditions.  There is NO
warranty; not even for MERCHANTABILITY or FITNESS FOR A PARTICULAR PURPOSE.
Visual Studio Code Setup
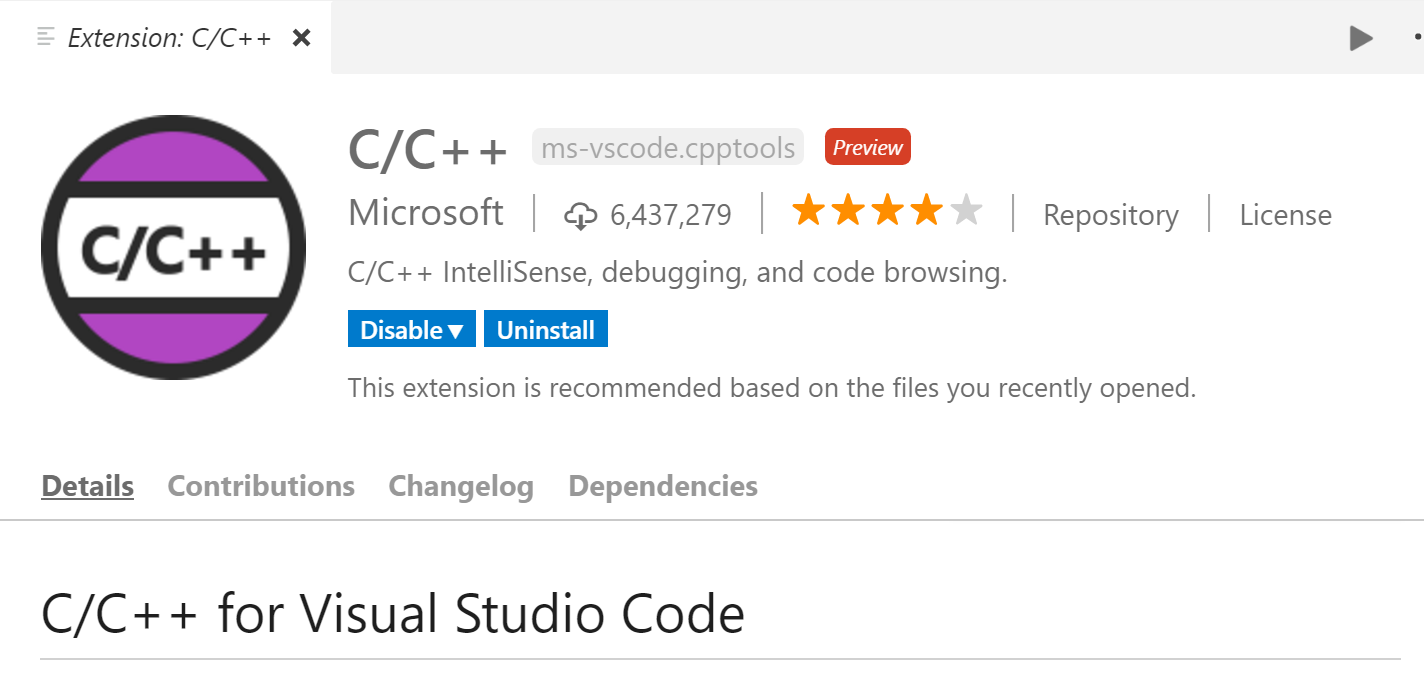
Open Visual Studio Code and select the Extensions panel. Next install the C/C++ extension.

Creating a C++ project
Launch Visual Studio Code and open a folder (this will be the root project folder). Create a new file called main.cpp inside this folder and place the hello world code from below inside. Make sure to save it.
#include <iostream>

int main() {
    std::cout << "Hello from VScode" << std::endl;
    return 0;
}
The end result should be this:

Next we need to create a task to build and run our application in a single step.
Hit CTRL - SHIFT - P to open the command menu and select Tasks: Configure Task.

Select Create tasks.json file from template.

Choose the Others option.

Replace the standard json config with the one from below.
{
    "version": "2.0.0",
    "tasks": [
        {
            "label": "build application",
            "type": "shell",
            "command": "g++",
            "args": [
                "-Wall", "--std=c++11",
                "main.cpp",
                "-o", "app.exe"
            ],
            "group": {
                "kind": "build",
                "isDefault": true
            }
        },
        {
            "label": "run application",
            "type": "shell",
            "command": "${workspaceFolder}/app.exe",
            "args": [],
            "presentation": {
                "reveal": "always"
            },
            "dependsOn": [
                "build application"
            ],
            "problemMatcher": []
        }
    ]
}
Now you can select Tasks => Run Build Tasks or hit CTRL - SHIFT - B to build your application.
You can also select Tasks => Run Task and select run application to both build and run the application.

If you wish you can also define a shortcut key to run the task. Goto File => Preferences => Keyboard Shortcuts and click the keybindings.json tag to open the file.

Add a shortcut entry between the square brackets as shown below. Make sure to edit the file shown on the right-hand side if you get the split view (left is default example):
// Place your key bindings in this file to overwrite the defaults
[{
    "key": "f5",
    "command": "workbench.action.tasks.runTask",
    "args": "run application"
}
]
You can choose the key yourself and the args is the label of the run application task.
Adding Extra Classes
To compile extra classes you need to add the cpp implementation file to your compilation task. For example for a file called robot.cpp you need to add the file to the args list of your build application task:
{
    "version": "2.0.0",
    "tasks": [
        {
            "label": "build application",
            "type": "shell",
            "command": "g++",
            "args": [
                "-Wall", "--std=c++11",
                "main.cpp", "robot.cpp",
                "-o", "app.exe"
            ],
            "group": {
                "kind": "build",
                "isDefault": true
            }
        },
        {
            "label": "run application",
            "type": "shell",
            "command": "${workspaceFolder}/app.exe",
            "args": [],
            "presentation": {
                "reveal": "always"
            },
            "dependsOn": [
                "build application"
            ],
            "problemMatcher": []
        }
    ]
}